
Sprouting 101: How to Sprout Grains, Nuts, and Seeds at Home
You might dismiss sprouts as not having much nutrition. They’re tiny, and you only have a little bit on your sandwich or salad, right?
That’s actually the complete opposite of the truth!
Sprouts are nutritional powerhouses that contain healing amounts of vitamins, minerals, and other nutrients — after all, big things come in small packages.
While some grocery stores carry packaged sprouts, many don't. But guess what?
That's okay! Sprouting can easily be done right in your own kitchen.
We'll help you out with the best tools and methods so you're prepared to grow your own sprouts and enjoy all the health benefits that come along with them.
[Do you want the benefits of sprouts without the work? I love Daily Elements! Just one spoonful a day gives you clean, organic, nutritious greens. You can save 15% using my exclusive code: GREENSMOOTHIEGIRL when you check out. Learn More Here.]
In this article:
- What is Sprouting?
- What Can You Sprout?
- What are the Benefits of Sprouting?
- What Happens When a Seed Germinates?
- How Do You Sprout at Home? 4 Easy Methods to Try
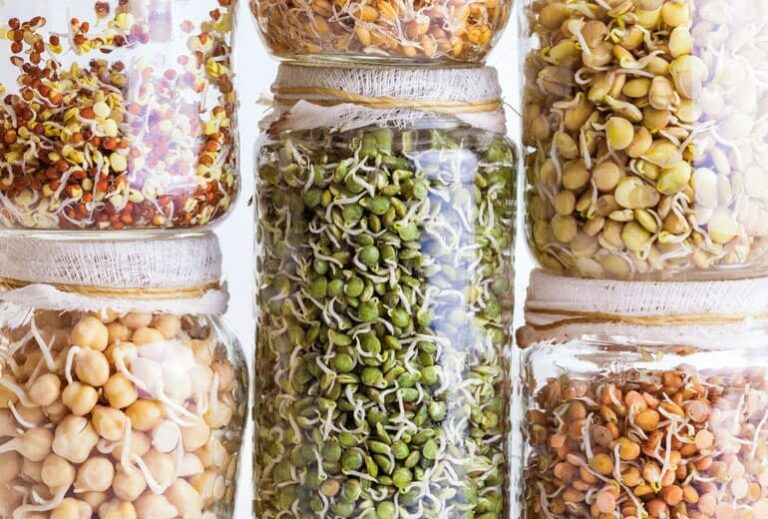
What is Sprouting?
Sprouting is the beginning stage of plant growth, when the hard exterior softens and the seed develops a sort of “tail” that is the new plant life.
You activate all the seed’s great benefits, but you don’t have to wait til the plant fully grows to get them.
When you eat seeds, you usually aren’t getting all the nutritional benefits that you could be, because they pass through your body, keeping the vitamins and minerals locked inside.
Natural sprout inhibitors, like phytic acid, keep the seed from growing into a plant—this natural self-defense mechanism allows the seed to wait to sprout until it gets all the way through the digestive tract and is deposited in soil where it can grow. You can thank that phytic acid for the watermelons that never grew in your stomach when you were a kid!
This sprouting inhibitor makes things like nuts and seeds shelf stable, but we want to unlock all of those amazing nutrients inside.
To deactivate that phytic acid, we water the seeds, and they begin to grow. When sprouting in the kitchen, we soak and rinse them to begin the process.
What Can You Sprout?
In addition to most seeds, sprouting can be done with most nuts, beans, grains, and legumes.
However, it’s important to make sure that these have not been irradiated, otherwise they won’t sprout. Irradiation is often required by the government, but this process wipes out the good bacteria as well as bad, and can damage important nutrients.
Aside from ruining your sprouting project, irradiated food has not been proven safe to be consumed by humans.
What Are the Benefits of Sprouting?
Sprouting may take a little time (one to five days, typically), but the actual hands-on activity is quite minimal, and it’s a money saver, too.
It’s all about patience, and you get plenty of nutritious return on your time investment.
- Gives you more bang for your buck. Sprouting allows your body to absorb more of the food’s nutrients as they become more bioavailable1. You’re using more of their power to fuel your body.
- Boosts your immune system. Sprouts are great immune-boosters due to their high antioxidant content2, which also has anti-inflammatory effects that help provide relief to chronic health conditions.
- Reduces digestive issues. Sprouting neutralizes components that would otherwise lead to gas and bloating. If legumes, for instance, typically create intestinal distress, you may find that you tolerate the sprouted version better. Germination unlocks digestive enzymes that help break down and assimilate food.
- Protects against cancer. There is evidence3 showing sprouts have antitumor effects on human melanoma tumors, and has been found to inhibit the proliferation of breast cancer cells as well4.
What Happens When a Seed Germinates?
Germination is when the seed begins to sprout.
As this process begins, enzymes known as phytase are biologically activated,5 automatically improving the nutritional value of the seed, grain, legume, etc. by breaking down the phytic acid and making its nutrients more bioavailable.
The seed’s proteins convert to a massively increased amount of amino acids, which are necessary for the health and development of our tissues.
Sprouting increases vitamins and minerals, too, especially those crucial B vitamins, and minerals like calcium, iron and zinc.
Other crucial nutrients also get a boost. For example, research shows that sprouted broccoli has 50 TIMES more cancer-preventative sulforaphanes than mature broccoli!4
Think of it this way: the seed is getting ready to grow into a whole new, nutritious, and mighty plant. Imagine all the power it needs to do that! All of that power is there for you, too.
How Do You Sprout at Home? 4 Easy Methods to Try

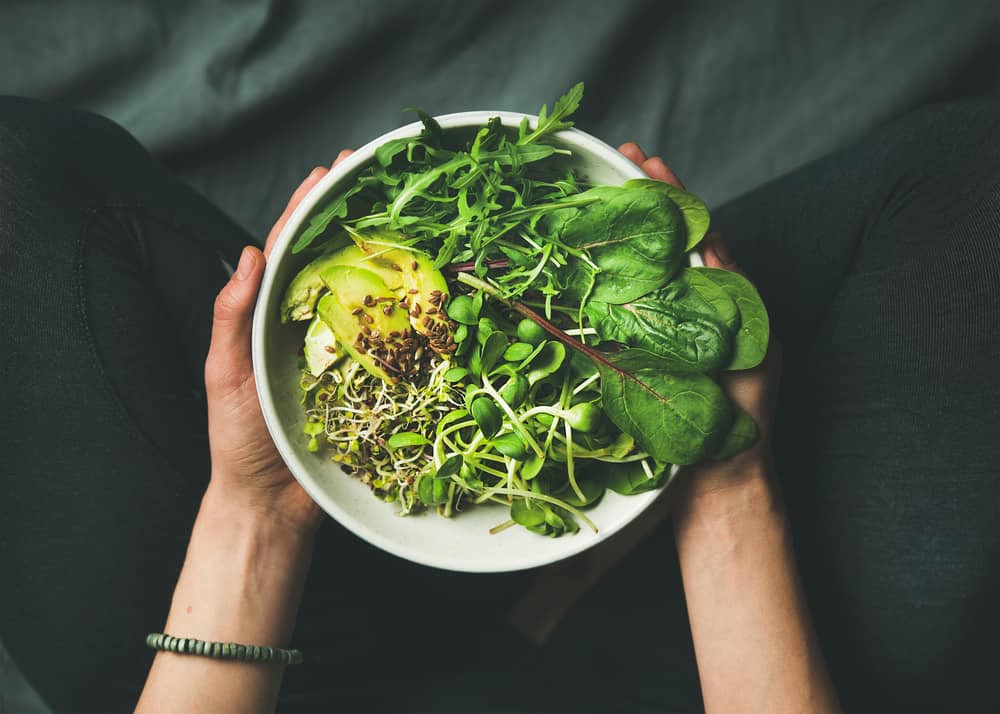
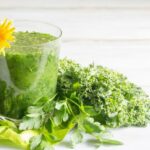
Here's a picture of some sprouts I'm growing!
There are a few methods for sprouting at home that are quite easy to do.
- Sieve method: Soak the seeds overnight in a bowl of room-temperature water, then rinse well in a mesh sieve, which will then sit over the empty bowl for the next couple of days until the seeds sprout. Make sure to rinse them twice a day. This method works best for legumes and grains like chickpeas, lentils, mung beans, buckwheat, and quinoa.
- Jar method: This technique will work well with just about any seed. To get started, rinse seeds well and place them in a wide-mouth jar (these ones work well). Cover the seeds with water, cover the jar with cheesecloth, and secure with a rubber band. Soak overnight, then drain and rinse. Keep jar upside down, at an angle to allow for air circulation, in a bowl in a dark, dry place like a cabinet and let sit until seeds begin to sprout, about two days. Make sure to rinse the seeds twice a day in this method as well.
- Tray method: Although plastic trays are often used in this method, it’s definitely not necessary as you can also sprout from glass and ceramic dishes (like a casserole dish, for instance). This is the most involved system because you’ll need to get some soil to put at the bottom of the dish, but it’s still quite easy, and works well with pea and sunflower sprouts, as well as wheatgrass (things that need room to grow upward). Lay down one layer of soil, sprinkle on the seeds, add another layer of soil, and give it a little water (a spray bottle will give you more control) every day for about five days. This method is best for when you to continue the growing process into leafy sprouts, rather than simple just-sprouted grains and seeds.
- Sack method: Great with cruciferous sprouts like broccoli and cabbage seeds, as well as clover and alfalfa. You’ll need a jar and a mesh bag. The bag can be the same type you use for straining when you make dairy-free milk. Simply place seeds into the bag inside of the jar, the fill it with water and let it sit for up to 24 hours. Drain and rinse the seeds while still in the bag, and place it back into the jar so that the seeds are suspended midway and the water can drain out. Do this twice per day until they begin to sprout.
Once you have your sprouts, you can use them in sandwiches, salads, soups, smoothies, and more!
[Don't want to grow your own? Microgreens are 40x more powerful than adult greens. I love Daily Elements for an easy way to get clean, organically sprouted microgreens in your diet every day. I invite you to try them! Use code GREENSMOOTHIEGIRL to save 15% when you check out.]
I’ve got a whole section of recipes in my 12 Steps to Whole Foods course that use germinated seeds, and some here on our site as well. Check them out here.
True Leaf Market is one of my favorite spots to get all kinds of sprouting seeds and general equipment. If you need anything to get yourself going on this great skill, look no further!
Some seeds are quite difficult to sprout on your own, like flaxseed and chia seed.
Because of their mucilaginous qualities, which create a gelatinous, egg-like consistency when mixed with water, the process can be quite messy and frustrating.
Flax is incredibly nutritious. In fact, I like to call it a miracle superfood for all of its amazing benefits, which makes it doubly frustrating that it’s a pain to unlock its valuable nutrients on your own.
Because I believe in the power of sprouting, and the healing power of flax, I created two sprouted products that allow you to conveniently add a ton of nutrients to your everyday smoothies, baked goods, protein balls, and more. I want this nutritional powerhouse more accessible to you, so we’ve done all the hard work for you!
Our GreenSmoothieGirl Sprouted Ground Flax Seed has been gently dried at a low temperature and cold-milled to best retain all of its raw nutrients, and is certified organic, gluten-free, soy-free, and dairy-free.
We also offer our raw, organic Tri-Omega Superfood blend of sprouted flax, chia, and broccoli seed for an even more nutritious addition to your day. It’s my favorite addition to my daily green smoothie!
With 4 grams of protein and fiber and 7 grams of omega essential fatty acids in each serving, the high content of EFAs stabilized by sprouting give our sprouted flax products a shelf life of two years!
But I have so many great ideas for ways you can use it to boost the nutrition in your daily diet, it won’t be hanging around for that long.
Read Next: 15 Ways to Use Sprouted Flaxseed
Resources
- Chavan, JK; Kadam, SS. “Nutritional improvement of cereals by sprouting.” Critical Reviews in Food Science and Nutrition. 1989;28(5):401-37. doi: 10.1080/10408398909527508
- Liu, CL et al. “Antioxidant activity of tartary (Fagopyrum tataricum (L.) Gaertn.) and common (Fagopyrum esculentum moench) buckwheat sprouts.” Journal of Agricultural and Food Chemistry. 2008 Jan 9;56(1):173-8. Epub 2007 Dec 12. doi: 10.1021/jf072347s
- Soucek, J et al. “Mung bean sprout (Phaseolus aureus) nuclease and its biological and antitumor effects.” Neoplasma. 2006;53(5):402-9. PMID: 17013534
- Li, Y et al. “Sulforaphane, a dietary component of broccoli/broccoli sprouts, inhibits breast cancer stem cells.” Clinical Cancer Research : An Official Journal of the American Association for Cancer Research. 2010 May 1;16(9):2580-90. doi: 10.1158/1078-0432.CCR-09-2937. Epub 2010 Apr 13.
- Dongyan, T et al. “A review of phytochemistry, metabolite changes, and medicinal uses of the common food mung bean and its sprouts (Vigna radiata).” Chemistry Central Journal. 2014 Jan 17. doi: 10.1186/1752-153X-8-4
 Robyn Openshaw, MSW, is the bestselling author of The Green Smoothies Diet, 12 Steps to Whole Foods, and 2017’s #1 Amazon Bestseller and USA Today Bestseller, Vibe. Learn more about how to make the journey painless, from the nutrient-scarce Standard American Diet, to a whole-foods diet, in her free video masterclass 12 Steps to Whole Foods.
Disclosure: This post may contain affiliate links that help support the GSG mission without costing you extra. I recommend only companies and products that I use myself.
Posted in: 12 Steps To Whole Food, Green Smoothies, Preparedness, Recipes, Whole Food


An interesting article, I’ll have to try this.
A couple of things I’m not clear on:
– How much of the seed’s soluble nutrients do you lose by soaking and then rinsing so much?
– The sprouts themselves are edible raw, but wouldn’t the seed itself still need cooking? Do you have to separate the sprouts from the seeds before eating?
I thought that once flax seed was ground it had to be used immediately. ?
Keep it in the freezer after ground. BTW It is good on ice cream too!
I have the same question: the seeds, once sprouted, must they be separated from the sprout to eat or do you eat the whole thing together? I’ve eaten broccoli but never heard of eating "sprouted" broccoli:)
Eat the entire sprout with the seed attached. Add a big forkful to your smoothie, top sandwiches and salads, place into soups, add to rice bowls. So good.
where do i buy the seeds for sprouting ?
Some can be found on Amazon.com.
Hello I was really interested in trying out broccoli sprouts. I have had digestive issues alot in the past so I really wanted to try this intervention in my diet. However I just came to know that I am pregnant and the internet generally is filled with no raw sprouts in pregnancy. So I really want to know whats your take in this. Thank you.
Good nurseries and garden centers that sell plants and seeds will carry packets of organic, untreated seeds specifically for sprouting.
One good seed company is Botanical Interests.
How do you store the seeds once they are sprouted. I don’t usually have any problem sprouting seeds, it’s keeping them after they are sprouted that I find they go bad.
If I have extra sprouting seeds can they be frozen and still sprout later?
I am interested in the answer to both Tammy and Andrea’s questions dated May 19, 2020 – how to store sprouted seeds (if you can’t use them up right away and how long can you store them for), and can the unsprouted seeds be frozen and sprouted later?
Thanks
After they are sprouted, how long do they last and do they need to be refrigerated?
From True Leaf Market’s website:
"Store sprouts for several days by drying with a paper towel and placing in an air-tight container in your vegetable bin. Sprouts risk freezing if stored wet."